Thursday, 12 July 2018

Prawn Summer Rolls

These Vietnamese summer rolls make a great lunch or dinner on a hot summer’s day and the use of the fresh herbs and chopped chilli make it super tasty and fragrant.

I’ve used prawns in these ones, but you can switch things up and make vegetarian ones too.

They are a little fiddly to roll up once you’ve popped the ingredients in but they are totally worth any mess you get into. Also the rice paper is tricky to master, and it’s normal to mess up the first one, but you’ll soon get the hang of it.

The below makes four – enough for two people for lunch.

Prawn Summer Rolls

Here’s how:
  • 12-14 king prawns
  • 60g vermicelli rice noodles (I use Mama)
  • 1 carrot
  • Handful radishes
  • 2 spring onions
  • ½ green pepper
  • 1 red chilli
  • Handful beansprouts
  • 2 iceberg lettuce leaves
  • Handful coriander leaves
  • Few chive leaves
  • Handful mint leaves
  • Vietnamese rice paper rounds
Dipping sauce:
  • 1 tbsp soy sauce
  • 1 red chilli
  • 1 garlic clove
  • 1 tbsp fish sauce
  • 1 tbsp sesame oil
  • Juice of ½ lime
  • 1 tsp caster sugar
  • 2cm piece fresh ginger

Firstly soak the rice noodles in a bowl of hot water for ten minutes.

While they are soaking make the dipping sauce by combining the soy, sugar, sesame oil and fish sauce with the juice of half a lime in a small bowl. Mince the garlic, slice the red chilli (keep the seeds in) and peel and slice the ginger and add to the bowl and give a gentle stir. Set aside.

Now peel and finely slice the carrot into thin batons, then cut the radish into similar thin slices and set aside onto a plate.

Roughly chop the lettuce and add to the plate.

Finely slice the green pepper and the spring onion and pop onto the plate.

Roughly chop the herbs and place on the plate with the beansprouts.

Now remove the noodles, which will now be soft and pliable, and squeeze them a little to release any moisture and put them onto the plate with the vegetables, ready to assemble.

Now for the tricky part – the rice paper. Firstly get two plates ready, or a chopping board and a plate to put the assembled summer roll. Now use a bowl of warm water (the one that had the noodles in would be fine), use your hands to quickly plunge one rice paper round into the water fully for 5-10 seconds, then remove and it should be soft and ready to pack, just place onto a couple of sheets of kitchen paper or a clean tea towel then place onto the plate or chopping board.

Prawn Summer Rolls assembly

Place 3 prawns in a line down the centre of the round leaving a small gap at one end, then add some lettuce, carrot, radish, pepper, spring onion and beansprouts, then add the herbs and finally a handful of noodles. Be careful not to over-load, as it will make the rolling process difficult.

When you’re ready, take the gap end and fold over the prawn and vegetable mixture, then carefully roll up as tightly as you can, and set aside – the wetness of the roll means it acts like a bit of an adhesive and should hold together whilst you prepare the other summer rolls.

Enjoy with the dipping sauce.

El Guaca, Clacton-on-Sea


We recently visited Clacton-on-Sea, Essex for a weekend full of dance competitions with Bridget’s dance school, and on the Saturday afternoon we found ourselves with a few hours to kill and so headed to the seafront, a place I spent lots of time at during my own childhood. Following a couple of hours spent on the pier and the fun fair, we looked for something to eat.

We stumbled upon El Guaca and were enticed by the sound of the Mexican menu and then even more so once we saw that the children would eat a free 3-course menu with each full meal purchased by an adult – definitely the decider.

Accustomed to some great standard Mexican restaurants in London, I admit we wondered if this would meet those exacting standards, but was actually pleasantly surprised in that El Guaca actually surpassed some places that we frequent regularly.

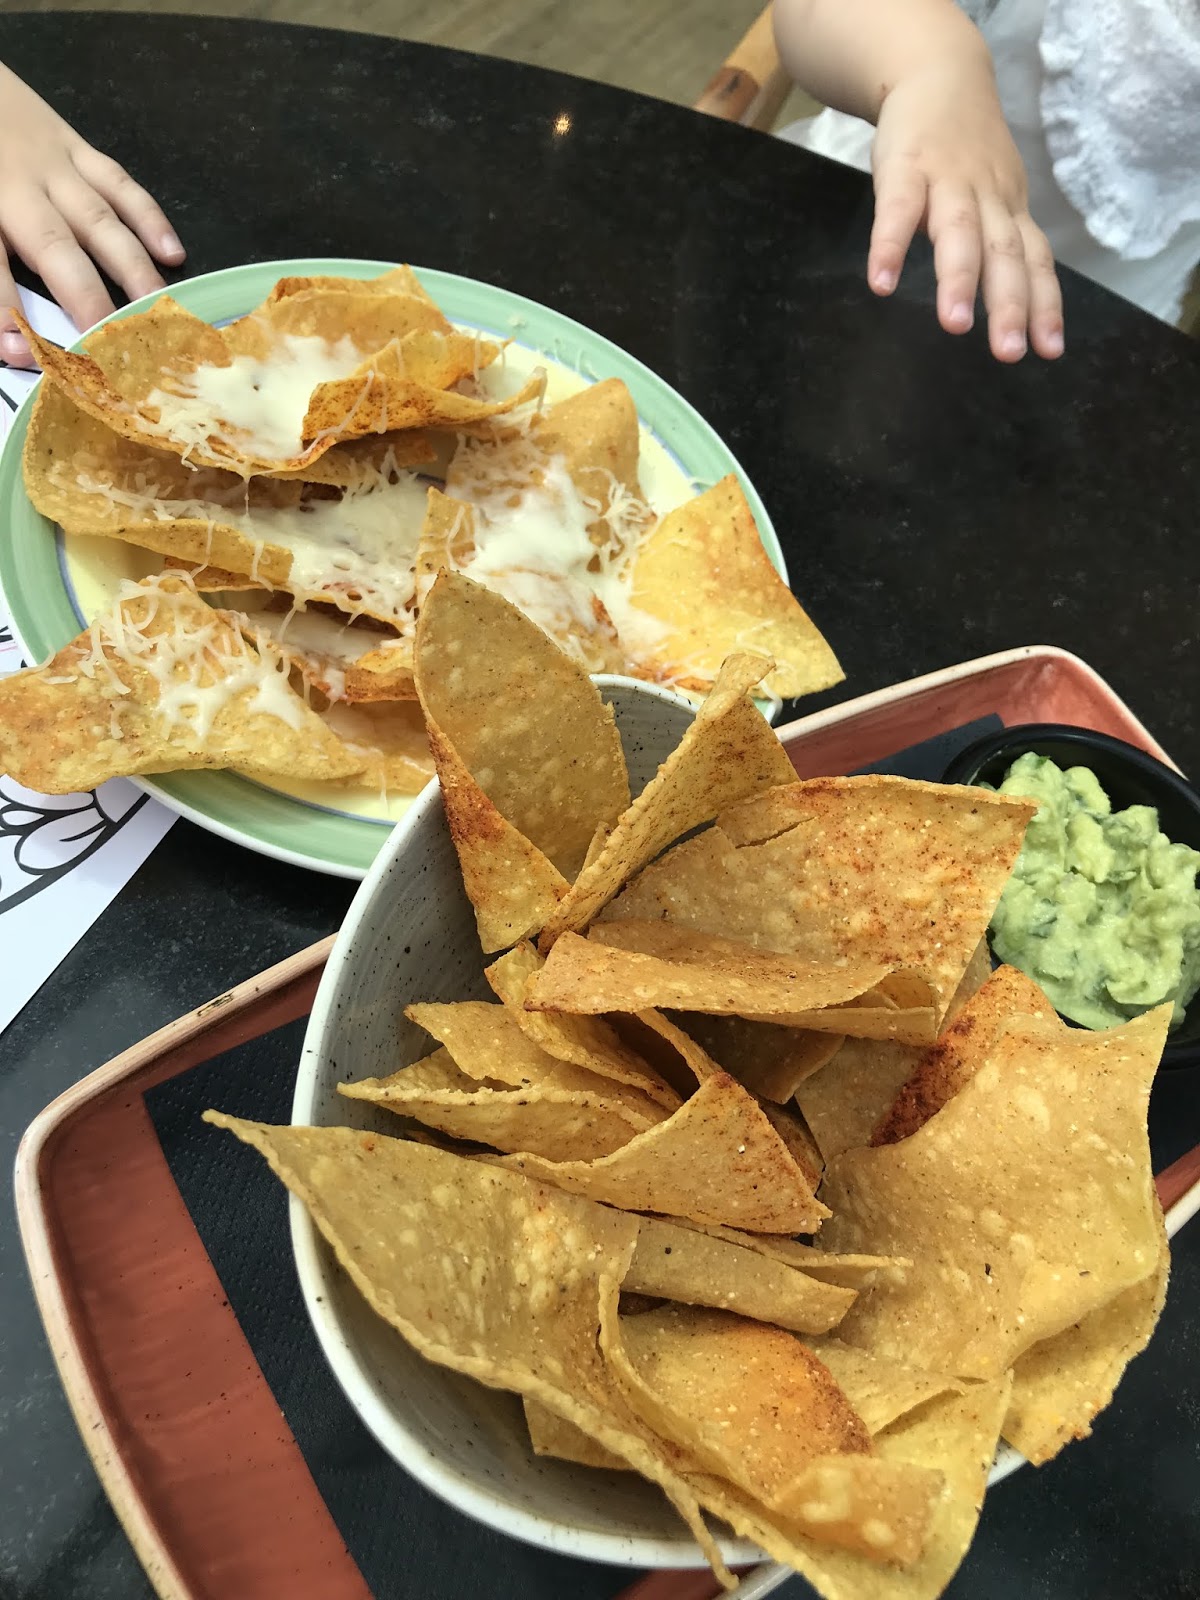
We ordered some tortilla chips with guacamole to start over some Coronas, and these were a great start – freshly made guacamole really offset with a squeeze of lime.

El Guaca Tortilla Chips, Guacamole, Kiddie Nachos


The girls had some nachos which were simply baked with a little grated cheese – perhaps a bit bland but perfect for young taste buds and they devoured the lot.

The mains were an actual triumph all round though.

For the kids, we played it safe and opted for the chicken strips which came with chips and salad – the chicken was actually not the usual breaded situation, but instead deliciously marinated and tender slices of cooked chicken – much better than we anticipated.

Children's Chicken Strips, El Guaca


Also the kids menu is great – they had a good range of main courses from the likes of quesadilla, fajitas, burritos and paella; which I think is great – stepping outside of the ‘norm’ for children’s menus and much less patronising. It’s reasonably priced at £6.95 got three courses and includes juice in that price which is great compared to a lot of chain restaurants where the add ons for a juice mean you’re looking at £10-12 for a 3 year old’s meal.

I had the pork pibil enchilada and it was fantastic. The pork was juicy, tender and had a fiery chipotle heat running through it, it really packed a punch. The creamy, cheesy topping on top of the rolled and pork-filled tortilla was generous and helped make this a real comfort dish and despite it being a generous portion it was served on a bed of Mexican rice too and had a little heap of guacamole there too. I didn’t manage the rice, but the enchilada was just great. I’d return for that in a heartbeat.

Enchillada, El Guaca

Glen chose the beef Chimichanga; basically for the un-initiated, this is a burrito filled with all of the delicious things you would expect in a burrito – cheese, peppers, refried beans, rice and salsa and then deep fried and topped with more salsa, sour cream and guacamole. In a word – epic.Served with Mexican rice and demolished.


Chimichanga, El Guaca

The girls had an ice cream included with their meal or they could have had churros with chocolate sauce, a brownie or buenelos. It was a hot day though so the ice cream went down a treat.

El Guaca was such a great find in Clacton, if we return next year for the competitions, I’m sure we’d head back. The staff were super friendly, especially with the children, the location is great – right on the seafront, overlooking the comings and goings and there’s seating both inside and out. The place is bright and airy and has some of the kitsch Mexican items you’d expect, from sombreros for picture opportunities to the décor with skulls etc. Apparently there are several El Guaca restaurants dotted around Essex and one in Wiltshire and one is Suffolk, if they’re anything like the Clacton outpost I’d give it a try.

The offer we enjoyed – the kids eat free - is apparently available every Saturday and Sunday and I would highly recommend it. It's a great family restaurant with something for everyone.

We paid around £45 plus tip for our meal and that was with a couple of rounds of Corona. They also have a ton of cocktails on the menu that looked very appetising – maybe next time we’ll go without the kids.

Moussaka - our Greek Meat Pie

Mousakka is a fantastic family meal and a great alternative to a cottage or shepherd’s pie but one which is equally devoured by my little ladies. Bridget calls this ‘Greek meat pie’ and her and Beatrice had it at least 7 times on our recent fortnight in Kefalonia – a firm favourite.

I favour the version which seems to be more prevalent in the Ionian Islands (Corfu, Kefalonia, Zakynthos) which has a layer of potato in a creamy white sauce enriched with egg, rather than the more well-known layer of aubergine. If you would rather include aubergine instead, just slice an aubergine into 1cm slices, and dry fry for 30 seconds before layering on top of the meat.

I use beef, which again seems to be the norm in the Ionian Islands, but again in some parts of Greece, Turkey and he Balkans this is more traditionally lamb mince, it’s totally adaptable and down to your own personal preference.

It is very much a Greek cooking method to ‘enrich’ a sauce using a beaten egg, which is done here, but please do ensure you wait until the sauce has completely cooled otherwise your hard work will be reduced to scrambled egg.

You’ll be hard pushed to find a more satisfyingly rich meat sauce than a slow cooked Greek one. Greek food often gets a bad rap in the UK, but I think it’s fantastic and my family certainly agree.If you tried and liked the Patsitsio recipe recently - this is up there with that for delivering on flavour, comfort and pleasing all of the family.

Feeds 4-5 and I serve with salad.


Moussaka - our Greek Meat Pie
Here’s how:
The meat:
  • Drizzle olive oil
  • 500g steak mince
  • 1 red onion
  • 1 clove garlic
  • 1 heaped tsp cinnamon
  • 1 heaped tsp dried oregano
  • 1 pinch salt
  • Black pepper to taste
  • 200ml red wine (I used Chianti as we had a bottle open)
  • 1 tbsp plain flour
  • Handful bay leaves
The topping:
  • 4-5 white potatoes (I used desiree)
  • 50g butter
  • 50g plain flour
  • 300ml whole milk
  • 50g Grana Padana or Kefalotyri if you can get hold of it
  • Nutmeg
I make the white sauce first by melting the butter into a non-stick pan, then slowly adding the flour and mixing the whole time with a wooden spoon to make a roux. Now slowly add the milk, mixing in the roux the whole time, pressing it down until it takes the form of the sauce rather than a big lump. Repeat until all of the milk is added, then add the grated cheese and a little nutmeg and continue cooking and stirring the whole time for a further five minutes until the sauce is thick and glossy. Now set aside away from the heat and allow to fully cool.

For the meat sauce, add a drizzle of olive oil to a pan, and place on a medium heat.

Finely dice the onion and mince the garlic and add to the pan. After a couple of minutes, add the mince, cinnamon and oregano and season generously. (You can leave out the salt if preparing for a small baby.)

Use a wooden spoon to break down the meat so it doesn’t clump together and once browned add the flour and mix well. This will help to thicken the final meat sauce.

Now add the red wine, passata and tomato puree, stir well and cook for 30 minutes until it has reduced down to a thick and unctuous ragu.

While the meat sauce is cooking, peel the potatoes and cut into slices about 1cm thick. Give them a good rinse then pour over boiling water add a pinch of salt and cook for five minutes, then drain.

By now the white sauce should have cooled sufficiently, so beat an egg in a separate bowl and then combine with the white sauce, mix well and it should add an extra glossiness to the sauce.

Once you are satisfied with the meat sauce, remove from the heat and spoon into an oven-proof dish.

Now layer the potatoes over so all of the meat is covered.

Now spoon over the white sauce, using the back of the spoon to spread out evenly and ensure everything has a coating of the sauce. The addition of the egg means this should help the topping to ‘hold’ well so once the dish is complete and you’re ready to dish up, you should be able to slice into neat squares of moussaka.

Scatter over the remaining grated cheese and a smidge more freshly grated nutmeg and this is ready for the oven. Bake for 35-45 minutes or until the topping is golden brown and the cheese is melted.


Moussaka - just out of the oven


Moussaka - a firm family favourite

Remove from the oven and allow to cool for a few minutes before portioning and plating up for the family. I serve with salad and this was enough for my family of four plus a generous portion for the following day’s lunch.

Here’s some of our other favourite Greek dishes:
Prawn Saganaki
Pastitsio
Briam
Gemistes
Feta & Spinach Open Tart
Greek Salad
Greek Chicken One Pot
Souvlaki
Tzatziki
Greek Yoghurt and Honey Baked Cheesecake

Monday, 5 March 2018

Creamy Chicken and Mushroom Pot Pie

Today marks the start of British Pie Week, a celebration of the humble pastry coated dish and to kickstart a week of flaky (and otherwise) posts and re-posts here is the recipe for our classic Creamy Chicken and Mushroom Pot Pie.

With just a puff pastry topping, it is slightly less calorific, but still has all the comforting qualities; a rich and satistfying filling with a golden flaky pastry ton top, and more importantly it’s universally popular. I’ve added a little thyme here as it such good friends with both chicken and mushrooms, but tarragon instead makes for a beautiful variation too.

The below feeds a family of four comfortably and you can serve with just a selection of vegetables, or the classic mash potato or even chips of you’re really feeling naughty.


Here’s how:
  • 1 tbsp vegetable oil 
  • 2 rashers smoked bacon 
  • 1 red onion 
  • 1 clove garlic 
  • 2 tbsps plain flour 
  • 2 large chicken breasts 
  • 250g mushrooms 
  • 1 tbsp dried thyme 
  • 350ml chicken stock 
  • 200ml milk (use full fat for the rich and creamy texture) 
  • Black pepper 
  • 1 pack pastry 
  • 1 egg Firstly peel and dice the onion and mince the garlic and set aside for the moment. Wash and slice the mushrooms and set aside.

Now pour the vegetable oil into a pan and place on a medium heat.

Now cut the bacon into small squares and add to the pan until crisp on both sides, turning as you need to.

As the bacon cooks, cut the chicken into small, bite-sized pieces.

Remove the bacon from the pan and set aside and now add the chicken to cook in the bacon fat and oil. Just allow to colour to white in each side, and remove from the pan and sit with the bacon.

Now add the onion and garlic to the pan and allow to saute. As soon as the onion is soft stir through the flour, which will make a bit of a paste, which will act as the thickener for the sauce.

Now add a few tablespoons of the stock to the onions and keep stirring rapidly, for a minute then repeat until all of the stock is added, then do the same with the milk, keeping the rapid stirring up constantly to ensure the sauce comes together. It will be quite thin at this point, but don’t be tempted to add anything to thicken, it will do so in the cooking process.

Now return the chicken and bacon to the pan, and season with black pepper (you can season with salt here, but the salt from the bacon should be sufficient, particularly if you’re cooking for children like I am) and add the thyme and give a good stir.


The filling for the Creamy Chicken and Mushroom Pot Pie

Now pre-heat the oven to 180 degrees.

Put on a low heat and cook for twenty minutes, by which point the sauce will have started to thicken up.

After twenty minutes, spoon all of the chicken mixture into a pie dish and allow to cool for fifteen minutes, again, this will allow for the sauce to thicken slightly more.

Now roll out the puff pastry, or if you have bought a sheet, simply place over the pie dish, and then use your hands to scrunch the pastry underneath the rim of the dish, then cut away the extra.

Now use your thumb all the way round to squeeze underneath and ensure it doesn’t fall off during the cooking.

With the excess pastry, you could make any pattern you choose, Bridget wanted to use her biscuit cutters and we added four hearts to ours.

Now crack an egg into a mug or small bowl and whisk. Then brush it all over the pie with a pastry brush to ensure it goes a lovely golden brown. The final thing to do is to make two or three slashes in to the pie topping to ensure the steam from the pie filling is able to escape, and so the puff pastry rises well and is flaky rather than soggy.

Place into the oven for 25-30 minutes, or until the pastry is well risn and a lovely shade of golden brown. Enjoy!


Creamy Chicken and Mushroom Pot Pie 


Here’s some other pie recipes:

Squash and Goat's Cheese Pot Pie

Beef and Lentil Beef Pie

Steak and Ale Pot Pie

Cheese and Vegetable Pie

Leftover Chicken and Mushroom Pie

Sunday, 4 March 2018

Haddock Fishcakes

Fishcakes are incredibly versatile; you can make so many different variations, whether it's the fish, the filling or the flavourings, and my family just love these haddock ones that use some smoked and unsmoked haddock. They're also a fantastic way to use up any leftover mash potato - we hate waste.

For these ones, I use Asian flavourings of chilli, ginger, garlic and coriander, but these are also great with chopped capers, parsley and a little mustard too.

These are a lovely meal to make with your children, they can get involved with chopping, mixing, making breadcrumbs, shaping the fishcakes and then the fun of dipping into egg, flour and breadcrumbs. Bridget helped me throughout making these yesterday, and was so proud to present her cooking to Daddy and her little sister (who devoured the lot). Children are always more open to trying things when they have been involved in the cooking process and my two never turn their nose up at fish - I just love cooking with my children.

I used a green chilli here as Glen and I love some spice in these fishcakes, however I make the girls fishcakes first, to avoid them getting a big hit of spice; but you make up your own mind. If you're not keen on spice, omit the chilli.

I served with a side salad, a handful of chunky chips and some sweet chilli sauce and the below makes four generous ones, or eight smaller ones.


Haddock Fishcakes

Here's how:

  • 200g haddock
  • 175g unsmoked haddock
  • 200g mash potato (I used Maris Piper here, but any will work)
  • 3 spring onions
  • 1 clove garlic
  • 3cm piece of ginger
  • Half a bunch of coriander
  • 1 green chilli (optional)
  • 1 egg
  • 3 tbsp plain flour
  • Sea salt and black pepper
  • Bowl full of breadcrumbs (I blitzed 2 slices granary bread in a blender)
  • Drizzle vegetable oil

Firstly pre-heath the oven to 180 degrees and then prepare the flavourings, finely slice the spring onions, mince the garlic clove and grate the ginger and add to a large bowl.

Roughly chop the coriander and add to the bowl. Finely slice the chilli and set aside if preparing for small children, or throw in the bowl.

Add the prepared mashed potato into the bowl too.

Now chop the haddock into bite sized pieces and throw into the bowl. Mix everything together until everything is well combined.


Now get three bowls and add to the first, the flour and a generous seasoning. To the second bowl crack in the egg (give a quick whip) and into the third and final bowl add the breadcrumbs.

Now is time to make each fishcake and there is no other way than with your hands. Take a generous handful and shape with your hands into thick rounds. Once you are happy with the shape, place onto a plate or a piece of parchment paper, and repeat the process until happy with all of the fishcakes. 


Haddock Fishcakes

Now drizzle the oil into a non-stick pan and place on a low heat to allow to heat up before a quick browning of each fishcake.

Now to complete the fishcakes, take one and dip into the flour first and turn around so it becomes coated in the seasoned flour, then dip into the egg mix, and then finally the breadcrumbs so they are fully coated, then return to the plate or the parchment paper and repeat until each fishcake is coated.

Now wash your hands - by now they will probably be duly coated in an eggy, breadcrumb mix. 

The pan should now be warm enough for you to quickly fry the fishcakes for a few minutes on each side, until golden brown. 

Then place onto a baking sheet and into the oven for 15 minutes to cook through. Enjoy!

Some other fishcake recipes that might be of interest:

Spiced Tuna Fishcakes
Mexican Style Salmon Fishcakes
Thai Salmon Fishcakes
Lightly Spiced Salmon Fishcakes
Colcannon Mackerel Fishcakes

Thursday, 1 March 2018

Busy Parent's Cooking Hacks

I try to cook from scratch for my family most of the week, but with work, various family activities and let’s face it, the challenges of every-day family life thrown in, some days it doesn’t happen and we reach for freezer favourites or order in.

As it’s a universal issue and I’ve realised that in my guise of ‘working Mum’, I have a few tricks and tips in my armoury to help make midweek meals easier to produce when time and energy supplies are dwindling.

Be a smug batch cooker
Family life is hectic, and aside from the uber organised, not everyone has a stash of pre-prepared, labelled and homemade meals in the freezer. But actually, most of us cook the family classic dishes, the crowd-pleasers on a regular basis, so why not cook an extra-large batch, and portion up to freeze? Meals that lend themselves well to this include Bolognese or meat ragu, chilli, curries, casseroles and homemade pasta sauces that double up as a quick pizza sauce too. It is honestly such a great feeling coming home from work, or a busy day out with the kids to a home-cooked meal ready and waiting for you to warm up at home.

Slow Cooked Beef and Lentil Curry

Greek Chicken One-Pot Casserole

Multiple meals
When batch-cooking, you need not feel restricted to constantly having the same meals time and time again, I mean, I get bored easily, let alone my kids, so I make things that work in a multiple of ways. A Bolognese doubles up as a lasagna filling, chilli makes a mean burrito or enchilada filling, and a casserole such as chicken and mushroom makes for a banging pot-pie filling.

Perfect the leftover dinner
Transform your leftover roast dinner meat into a variety of delicious dinners; the possibilities are honestly endless. Make a mean noodle soup with any meat, stock, ginger, garlic, spring onions and chilli, sliced greens or lettuce, soy, a dash of fish sauce and sesame oil and a handful of beansprouts and coriander at the end. Other ideas are to serve the leftover meat with herby couscous, salad and a yoghurt dip, rehydrate in a BBQ sauce and serve in wraps with sour cream and salad or make a quick potato-topped pie.

Pork Noodle Soup

Leftover Roast Chicken & Mushroom Pie

The beauty of a sandwich
After a heavy day at work or school a simple sandwich might not cut it, but if you elevate it to a club sandwich (3 layers baby), with all of your family’s favourite fillings, think roast chicken, deli meats, cheeses, pickles and salad and throw a skewer in the top, this is a lot more exciting. Serve with a few oven chips, or dare I say it, crisps. It might not be the most nutritional thing they eat that week, but it will be fun.

Throw it in a bun
So, so, so many things can be served in bread rolls, ciabatta, brioche buns or my personal favourite stand-by, part-baked baguettes. This is great for when patience, time or energy is lacking for peeling potatoes or cooking up rice or pasta. I’m not just talking about burgers and sausages (though these work too), but any kind of meat works here with coleslaw and salad as would fish fingers. You could really mix it up and serve chilli or Bolognese in a bun too (hello sloppy Joe).

Quicky pizzas
These pizzas are such a standby fail-safe meal in our home, popular with all. The base can be anything from tortilla wraps, naan bread or even pitta. A simple tomato sauce (defrosted from the freezer) is smeared over the top and then add any fillings you like and that you have in stock. Peppers, onions, mushrooms, sweetcorn, sliced meat, olives; the options are endless, and you know what, just throwing on some grated cheese works too.

Pitta Pizza

Eggs is eggs
My Mum always said ‘you can always make a meal out of eggs’ and this is a rule to remember. You can serve eggs a whole heap of ways on toast, but the good old fashioned omelette or frittata is another winning meal you can prepare in five, and have on the table in another five using simple ingredients you have in your vegetable rack. Another egg-concoction that can be savoury and goes down a storm with kids is crepes or pancakes. Easy, cheap and quick – winner!


Crepes

Base bags
OK so this might be taking kitchen organisation a step too far, but if you are truly time-poor, it’s a great shortcut midweek, when resources are minimal. Get a ton of onions, garlic, celery and carrots and finely dice and equally distribute between a few bags for the ‘base’ of many a meal. These work as the start of many stews, pasta sauces, ragus, soups and loads more. They freeze well and are super useful when you’re in a hurry.

Flavour saviours
As cheesy as it sounds, having a few additional ingredients to hand at any given time in the kitchen, can rescue the bland, enhance the mundane and generally improve meals in a mere moment. As well as your usual olive oils and balsamic vinegars, I’m talking about flavoured oils such as chilli, garlic and truffle to drizzle over pasta, soups, stews or even pizza. Spicy sauces are another way of injecting a quick-fire hit of heat into any dish, sriracha and hot pepper are my favourites.

Monday, 26 February 2018

Asian Style Pork Burgers with a Ribbon Salad

We absolutely love burgers in our house, in all their glorious guises, and even when dieting, these feature regularly on our weekly menus, minus the buns and with a salad instead of chips and slaw.

They're only Asian in the sense that the main of the flavourings; sesame oil, lime juice, fish sauce, soy sauce, garlic and ginger and I serve with a little salad of carrot, cucumber and radish ribbons with a quick Asian dressing; delicious, fragrant and very satisfying. 

The below makes four adult sized burgers; or in our case, 3 plus two smaller ones for my two little ones.

Asian Style Pork Burgers with Ribbon Salad


Here's how:


  • 750g pork mince
  • 5 spring onions
  • 3cm piece of ginger
  • 2 cloves garlic
  • 1 green chilli
  • Juice of 1 lime
  • Handful of chives
  • Big handful coriander 
  • 1 tbsp sesame oil
  • 1 tbsp soy sauce
  • 1 tbsp fish sauce
  • Black pepper

For the salad:

  • 1 carrot
  • 1/2 cucumber
  • Handful raddishes
  • Handful sesame seeds
  • 1 tsp sesame oil
  • 1 tsp soy sauce
  • Drizzle honey
  • 1 tsp garlic oil
  • 1 cm piece of ginger

Firstly make the burger patties; finely slice the spring onions and chilli, peel and grate the ginger and crush the garlic into a large bowl. Chop the chives and coriander and add to the bowl.

Pop the minced pork into the bowl and then give a generous seasoning with black pepper. Squeeze in the lime and add the soy, fish sauce and sesame oil.  

Now use your hands to mix the meat, mix well to ensure all of the flavourings become evenly distributed; be careful not to overwork the meat. 

Now pull out evenly shaped mounds of the meat and shape into patties with your hands, and set onto a chopping board or a piece of parchment paper. 

Now place a sheet of tinfoil over the grate in your grill, and place each patty on there and place on a medium heat for seven minutes, then turn each patty over and cook for a further seven minutes, or until cooked through.

Now ensure to wash your hands and clear the bowl that the raw meat has been in, and prepare the salad.

Peel the carrot and use a vegetable peeler to make thin ribbons of carrot, and set aside. Do the same with the cucumber, and then the raddishes; be careful if they're small ones, that you don't cut your fingers, and assemble all of the ribbons on a plate.

Now make the very quick salad dressing by simply combining the soy, sesame and garlic oil and the honey and grating in the ginger and give a good whisk. Drizzle over the salad ribbons and then toss over 1/2 tbsp sesame seeds over each salad.

Once the burger is cooked through, and nicely browned on each side add to the plate with a little drizzle of sweet chilli sauce, or if you're serving with buns, add the chilli sauce to the bun first. Enjoy!