Showing posts with label Cooking with children. Show all posts

Tuesday, 20 October 2020

Halloween Chocolate Bark

This is hardly a recipe - just a good idea for a half term activity with the children with a spooky Halloween theme.

You can use absolutely any sweeties or other items, such as biscuits, pretzels or chocolate buttons, but the jelly sweets look and taste great. 

Halloween Chocolate  Bark


Here's how:

  • 400g Milk chocolate (if making for adults, dark chocolate is nice too)
  • Selection of Halloween jelly sweets (we had bones, brains, eyeballs, fingers and thumbs!)
  • Selection of Halloween or chocolate sprinkles (we used both)
  • Selection of chocolate treats (we used Orange Smarties and the Lidl version of M&M's)

Fill and boil a kettle then half fill a small saucepan and place on a low heat.

Break up the milk chocolate and place into a heat-proof bowl and place above the boiling water and allow to melt. Use a wooden spoon to help the chocolate to break down and stir.

Line a baking tray with greaseproof paper and once fully melted pour the chocolate into the tray and move the tray around to evenly distribute the oozing chocolate.

Now simply place the sweet treats you have all around. My kids absolutely loved doing this bit and you can imagine how many sweets didn't make it to the bark! 

Once complete, leave to cool completely on the kitchen side and once cold, place into the fridge for at least an hour to set. 

Now remove from the tray, place onto a chopping board and cut with a sharp knife into shards of bark. Enjoy!


Monday, 20 April 2020

Chocolate Hobnobs

If like me, this lock down has got you baking a whole lot more, especially with the kids, then give these gorgeous homemade Chocolate Hobnobs a try. They are without a doubt my favourite biscuit for tea-dunking and the children really enjoyed making them, especially dipping them in chocolate. 

You could use milk or dark chocolate, we used milk as we had a ton of Easter eggs leftover, but use what you prefer or have at home. We also used Golden Syrup, but if you don't have any in stock, you could try using maple syrup or honey instead. 

The below makes 15 delicious biscuits - be warned, they won't last long.

Chocolate Hobnobs


Here's how:
  • 120g porridge oats
  • 120g plain flour
  • 120g caster sugar
  • 120g butter
  • 1.5 tbsp golden syrup
  • 1 tsp baking powder mixed in with 1 tbsp boiled water
  • 130g milk chocolate (or dark if you prefer)

Firstly pre-heat the oven to 180 degrees and line two baking trays with grease-proof paper.

Pop the flour, porridge oats and caster sugar into a mixing bowl and roughly combine with a wooden spoon. Make a bit of a hole in the middle, or a well, as you would when making dough.

In a small saucepan, place the 120g butter with the golden syrup on a low heat to gently melt and then remove from the heat and stir in the boiled water and baking powder mixture.

Now pour the butter and syrup mixture into the dry ingredients into the hole, a little at a time, and gently combine, repeating the process until you have a sticky batter-like substance. At this point, it should have a really tempting aroma too.

Once all combined, place 1 tbsp of the mixture onto the baking sheet, with room to spread out. And repeat until you have x5 on each baking sheet. They should be like a little ball, as they will spread out as with cookies when you bake them.

Place into the hot oven for 9 minutes exactly, and then remove, allow to cool on the tray for five minutes, during which time they will harden a little and become less delicate. Then use a fish slice to carefully remove them and place onto a wire rack or board to cool further.

Repeat the process until all biscuits have been baked, and are cooling on a wire rack or wooden board.

Now to melt the chocolate, break up into small pieces and heat over a small pan of boiling water, or in microwave if you prefer for 2-3 minutes, but opening and stirring every 30 seconds so the chocolate doesn't become one big sticky mess.

Once melted, remove the bowl and place onto the kitchen side. Now take each biscuit and gently dip into the chocolate, until half (or if you prefer all) of the biscuit is coated in chocolate and then once again, place onto a board or wire rack to allow the chocolate to set. Repeat the process until all of the biscuits have a delicious chocolate coating.

Be warned, these are ridiculously moreish! Enjoy!

If you are looking for some easy baking recipes with the children during lockdown here are some of our favourites:

Sunday, 9 February 2020

Lemon Curd Drizzle Cake

This is a gorgeously moist and zingy cake that is perfect to enjoy at home with a cuppa during this horrendously cold, windy and wet weather. I made it yesterday with my girls to keep them occupied for a while, and after we enjoyed a slice, warm from the oven we delivered some to my Dad at his allotment which was very well received.

I've given a double icing here - but you could cut down the calories and sugar by just having the usual lemon drizzle icing.

Lemon Curd Drizzle Cake


Here's how:

The cake batter:

  • 225g salted, softened buter
  • 225 caster sugar
  • x4 large eggs
  • 225g self raising flour
  • 3 tbsp lemon curd
  • Juice and zest of x1 lemon


Drizzle icing:

  • 85g caster sugar
  • Juice of x1.5 lemons
  • Zest of x1 lemon


White icing:

  • 100g icing sugar
  • Juice of 1/2 lemon
Firstly pre-heat the oven to 180 degrees and grease and line a 20cm square or circular tin with baking paper. 

In a large mixing bowl place the softened butter and caster sugar and beat together with a wooden spoon.

Once combined, crack in each egg one at a time, mixing in as you go. 

Now sift in the self raising flour, squeeze in the lemon juice and add the zest and combine until you have a thick cake batter.

Once satisfied with the batter, place about half into the bottom of the cake tin and use the back of a metal spoon to smooth down a little.

Now take the lemon curd, and use a teaspoon to dot spoonfuls of it all over the cake batter until you've used it all up.

Now spoon over the remaining cake batter, smooth down and place into the centre of the oven for 35 minutes exactly.

In the meantime you can prepare your drizzle icing and white icing. For the drizzle simply add the lemon juice to a small bowl with the caster sugar and mix well.

For the white icing it's the same method - combine the icing sugar and lemon juice and mix well. Now place into an icing bag, or a food bag will suffice perfectly.

When you carefully remove the cake from the oven, take a wooden skewer and prick in the centre of the cake - if it comes out without wet crumbs, it's cooked, so remove it from the oven. If you have wet crumbs, return to the oven for five more minutes.

Now use the wooden skewer to prick all over about ten times, whilst still hot in the cake tin, which will create a runway to the cake when you pour the drizzle icing over.

Pour the drizzle icing over making sure the entire top of the cake gets a good coating.

Finally make a small snip into the corner of the icing bag (if using a food bag) and then just drizzle the white icing all over.

Allow to cool for five minutes before carefully turning out of the pan. This is delicious warm from the oven or cold but always with a cup of tea or coffee. Enjoy!

Thursday, 18 April 2019

Easter Cookies with Mini Eggs

I absolutely love the annual onslaught of Easter and all the chocolatey goodness that comes our way since having children but I'm very nervous about Mini Eggs or any other solid chocolate eggs of that shape and size because of the obvious choking risk.

We came up with these cookies last year in order to allow my girls to enjoy the Mini Eggs that were bought for them without me panicking about any choking risk. 

The cookie mixture is a recipe I use loads and is always well-received, you could always up the chocolate chips instead, or add raisins and oats instead. 

Bridget and Beatrice enjoyed making these this morning and enjoyed eating a couple straight after baking even more. I adore cooking with my girls - it's a fun, educational and sensory experience. 

Whatever your plans this Easter have a fabulous long weekend.

Easter Cookies with Mini Eggs


Here's how:

Ingredients:

  • 150g salted butter, room temperature
  • 85g brown sugar
  • 85g granulated sugar
  • 1 egg
  • 2 tbsp milk
  • 2 tsp vanilla
  • 1 tsp bicarbonate of soda
  • 2 tbsp cocoa (I use Green & Black's)
  • 240g plain flour
  • 100g milk chocolate
  • Mini Eggs (80g bag) 
Method:

Firstly pre-heat the oven to 190 degrees and line a couple of baking trays with grease-proof paper.

If cooking with children, I tend to do the chopping etc. first - so I would at this stage chop the Mini Eggs in half or thirds and chop the chocolate bar into chunky pieces.

Now measure the butter and sugars and add to a mixing bowl and cream together with a wooden spoon.

Bridget and Beatrice making Easter Cookies with Mini Eggs

Bridget and Beatrice making cookies

Once well combined, add the egg and vanilla and mix well. 

Now add the flour, cocoa, bicarbonate of soda and the milk and again, mix well. 

Once you have achieved a good cookie dough consistency, add the chocolate chunks - but not the Mini Eggs. (If the cookie dough is too clunky or dry add a little extra milk a drop at a time until you are happy). 

Now use a couple of tablespoons to scoop out the cookies - you will need to do in a couple of batches, so don't be tempted to pack them on too tightly on the baking trays. Use about a heaped tablespoon in a round and place 5-6 on each,  try to keep them well spaced apart. You don't need to press them down or anything just leave in a round.

Place them into the oven for four minutes, by which time they will have spread out a little, and then remove and carefully place the Mini Eggs into each cookie 2-3 pieces  per cookie, with the coloured side up. 

Return to the oven and cook for a further 8 minutes. 

Easter Cookies with Mini Eggs

Remove from the oven and place onto a wire rack or board to cool. Enjoy!


Sunday, 4 March 2018

Haddock Fishcakes

Fishcakes are incredibly versatile; you can make so many different variations, whether it's the fish, the filling or the flavourings, and my family just love these haddock ones that use some smoked and unsmoked haddock. They're also a fantastic way to use up any leftover mash potato - we hate waste.

For these ones, I use Asian flavourings of chilli, ginger, garlic and coriander, but these are also great with chopped capers, parsley and a little mustard too.

These are a lovely meal to make with your children, they can get involved with chopping, mixing, making breadcrumbs, shaping the fishcakes and then the fun of dipping into egg, flour and breadcrumbs. Bridget helped me throughout making these yesterday, and was so proud to present her cooking to Daddy and her little sister (who devoured the lot). Children are always more open to trying things when they have been involved in the cooking process and my two never turn their nose up at fish - I just love cooking with my children.

I used a green chilli here as Glen and I love some spice in these fishcakes, however I make the girls fishcakes first, to avoid them getting a big hit of spice; but you make up your own mind. If you're not keen on spice, omit the chilli.

I served with a side salad, a handful of chunky chips and some sweet chilli sauce and the below makes four generous ones, or eight smaller ones.


Haddock Fishcakes

Here's how:

  • 200g haddock
  • 175g unsmoked haddock
  • 200g mash potato (I used Maris Piper here, but any will work)
  • 3 spring onions
  • 1 clove garlic
  • 3cm piece of ginger
  • Half a bunch of coriander
  • 1 green chilli (optional)
  • 1 egg
  • 3 tbsp plain flour
  • Sea salt and black pepper
  • Bowl full of breadcrumbs (I blitzed 2 slices granary bread in a blender)
  • Drizzle vegetable oil

Firstly pre-heath the oven to 180 degrees and then prepare the flavourings, finely slice the spring onions, mince the garlic clove and grate the ginger and add to a large bowl.

Roughly chop the coriander and add to the bowl. Finely slice the chilli and set aside if preparing for small children, or throw in the bowl.

Add the prepared mashed potato into the bowl too.

Now chop the haddock into bite sized pieces and throw into the bowl. Mix everything together until everything is well combined.


Now get three bowls and add to the first, the flour and a generous seasoning. To the second bowl crack in the egg (give a quick whip) and into the third and final bowl add the breadcrumbs.

Now is time to make each fishcake and there is no other way than with your hands. Take a generous handful and shape with your hands into thick rounds. Once you are happy with the shape, place onto a plate or a piece of parchment paper, and repeat the process until happy with all of the fishcakes. 


Haddock Fishcakes

Now drizzle the oil into a non-stick pan and place on a low heat to allow to heat up before a quick browning of each fishcake.

Now to complete the fishcakes, take one and dip into the flour first and turn around so it becomes coated in the seasoned flour, then dip into the egg mix, and then finally the breadcrumbs so they are fully coated, then return to the plate or the parchment paper and repeat until each fishcake is coated.

Now wash your hands - by now they will probably be duly coated in an eggy, breadcrumb mix. 

The pan should now be warm enough for you to quickly fry the fishcakes for a few minutes on each side, until golden brown. 

Then place onto a baking sheet and into the oven for 15 minutes to cook through. Enjoy!

Some other fishcake recipes that might be of interest:

Spiced Tuna Fishcakes
Mexican Style Salmon Fishcakes
Thai Salmon Fishcakes
Lightly Spiced Salmon Fishcakes
Colcannon Mackerel Fishcakes

Sunday, 18 February 2018

Kid Crepes

Crepes, or rather pancakes, are an absolute staple food in our house when it comes to the kids. I make a vast variety of types and fillings, mostly sweet, and mostly for breakfast or weekend brunching; but these savoury ones are a great favourite for a fast lunch or dinner.

You could use any number of fillings, but for my two the clear winning choice is ham, Cheddar cheese and sweetcorn, very beige basic, and very appealing to the under fives.

This is another simple recipe that is more assembly than anything else, so do recruit your little ones to help you - cooking with children is such an important activity, that can be messy but is mostly fun and will equip your kids with life skills.

I always serve with some vegetables or salad fingers, such as peppers, cucumber, radish etc. to make it feel slightly less 'lazy Mum', but the fact is these are super simple and quick to make, cheap, you're likely to always have the ingredients for them and they're universally popular.

The below makes a batter for about six pancakes, and 1 per child is more than sufficient, but the batter keeps well overnight in the fridge (win, win).

Kids Crepes

Here's how:


  • Drizzle vegetable or rapeseed oikd
  • 125g plain flour
  • 2 eggs
  • 300ml milk (full fat is always best for pancakes)
  • Pinch salt
  • 2 slices ham
  • 2 tbsp Cheddar cheese
  • 2 tbsp sweetcorn kernels


Make the batter by mixing the flour, milk and the eggs with a fork or whisk.

Add the oil to a frying pan on a low to medium heat and in the meantime chop the ham and grate the cheese.

Now use a ladle to pour in the amount needed for x1 pancake into the pan. Allow it cook for 30-seconds to one minute until it has gone from a liquid batter to s solidified pancake, now use a fish slice to slowly ease it off the pan, all the way round the edge, then flip it over to do the other side.

On one half of the pancake, scatter over the ham, cheese and sweetcorn and after about 1 minute, flip the empty half of the pancake, over the filled side and cook for another 30 seconds, press down with the fish slice. Now flip again, and cook for 30 seconds to a minute more to allow the cheese to melt a little.

Kids Crepes

Remove from the pan, and repeat the process.

Slice into fingers and serve with your selection of veggies. Enjoy!

Here are a mixture of other sweet and savoury pancakes that might appeal:
Classic British Pancakes
Berry and Yoghurt Pancakes
Salmon and Dill Potato Pancakes
Banana and Oat Pancakes
Courgette and Corn Pancakes

Saturday, 17 February 2018

Turkey Meatball Bake

This is a lovely family recipe for all the family getting stuck into one central dish. It's also a recipe that lends itself well to 'cooking with children' which is an absolute passion here, and my Bridget who's 3 and a half, loves nothing better than putting her apron on and helping in the kitchen.

I served here with a Mediterranean loaf (Tesco bakery, thank you very much), but any fresh bread would work, as would fresh pasta or even rice or couscous. There's just something more fun about dipping in the bread and mopping up all of the sauce.

I use turkey as it's incredibly lean, but you could any minced meat here, and the herbs I've included were as I had them in stock, again you can experiment or use dried if you prefer. It really is worth making your own meatballs, you don't need to pad them out with breadcrumbs or egg or anything, they're just pure meat and seasonings - no nasties.

The below serves us four (two adults, and two under 3's).

Turkey Meatball Bake

Here's how:

  • 1 tbsp olive oil
  • 1 red onion
  • 2 cloves garlic
  • 3 celery sticks
  • 1 carrot
  • 1 jar passata
  • 1 tin cannellini beans
  • 1 tsp dried oregano
  • 1/2 glass red wine
  • 3 bayleafs
  • Handful basil leafs

For the meatballs:

  • 450g turkey mince
  • 3 spring onions
  • Drizzle of garlic oil
  • Handful each of: parsley, tarragon, chives

For the bake:

  • 1 ball of half fat mozzarella

Firstly make the tomato sauce. Start by pouring in the olive oil to a saucepan and placing on a low heat.

Peel and dice the onion and crush the garlic and add to the pan. Finely slice the celery sticks and add to the pan.

Once they're all softened, add the passata, red wine, bayleafs and oregano as well as seasoning generously with sea salt and black pepper.

Grate the carrot and add to the sauce, and finally add the cannellini beans then give a good stir through and allow to cook for 20-30 minutes. Remove from the heat and throw a few basil leaves in, give a good stir then set aside.

The tomato sauce with beans

In the meantime, make the meatballs. Place the mince into a bowl.

Finely slice the spring onions, and chop the herbs and add to the bowl with the garlic oil and give a good mix. There's only hands to be used here, a spoon won't cut it. Mix really well, trying to get the herbs distributed well throughout the meat, but be careful not to overwork the meat.

Now pull off a small piece, about 1 tbsp of the meat, and roll around in your hands to make a meatball then set aside. Repeat until all of the meat has been transformed into rounds.

Turkey Meatballs

Now remove the bayleafs from the tomato sauce and pour into an oven-proof dish. Place each meatball into the sauce, with a little space in between.

Finally tear the mozzarella up into slithers and place all around the top of the dish, so to evenly distribute the cheese.

Give one final seasoning over the top of the dish and it's ready to go into the oven.

Cook in a pre-heated oven for 30 minutes, until the meatballs are cooked through, and the cheese is melted and gooey all over the top. Serve with your choice of accompaniments. Enjoy!

Here are some other makeover recipes I make using turkey mince:
Turkey and Hidden Vegetable Bolognese
Turkey and Vegetable Parsnip Topped Pie
Turkey and Charred Vegetable Ragu Pasta Bake

Thursday, 9 November 2017

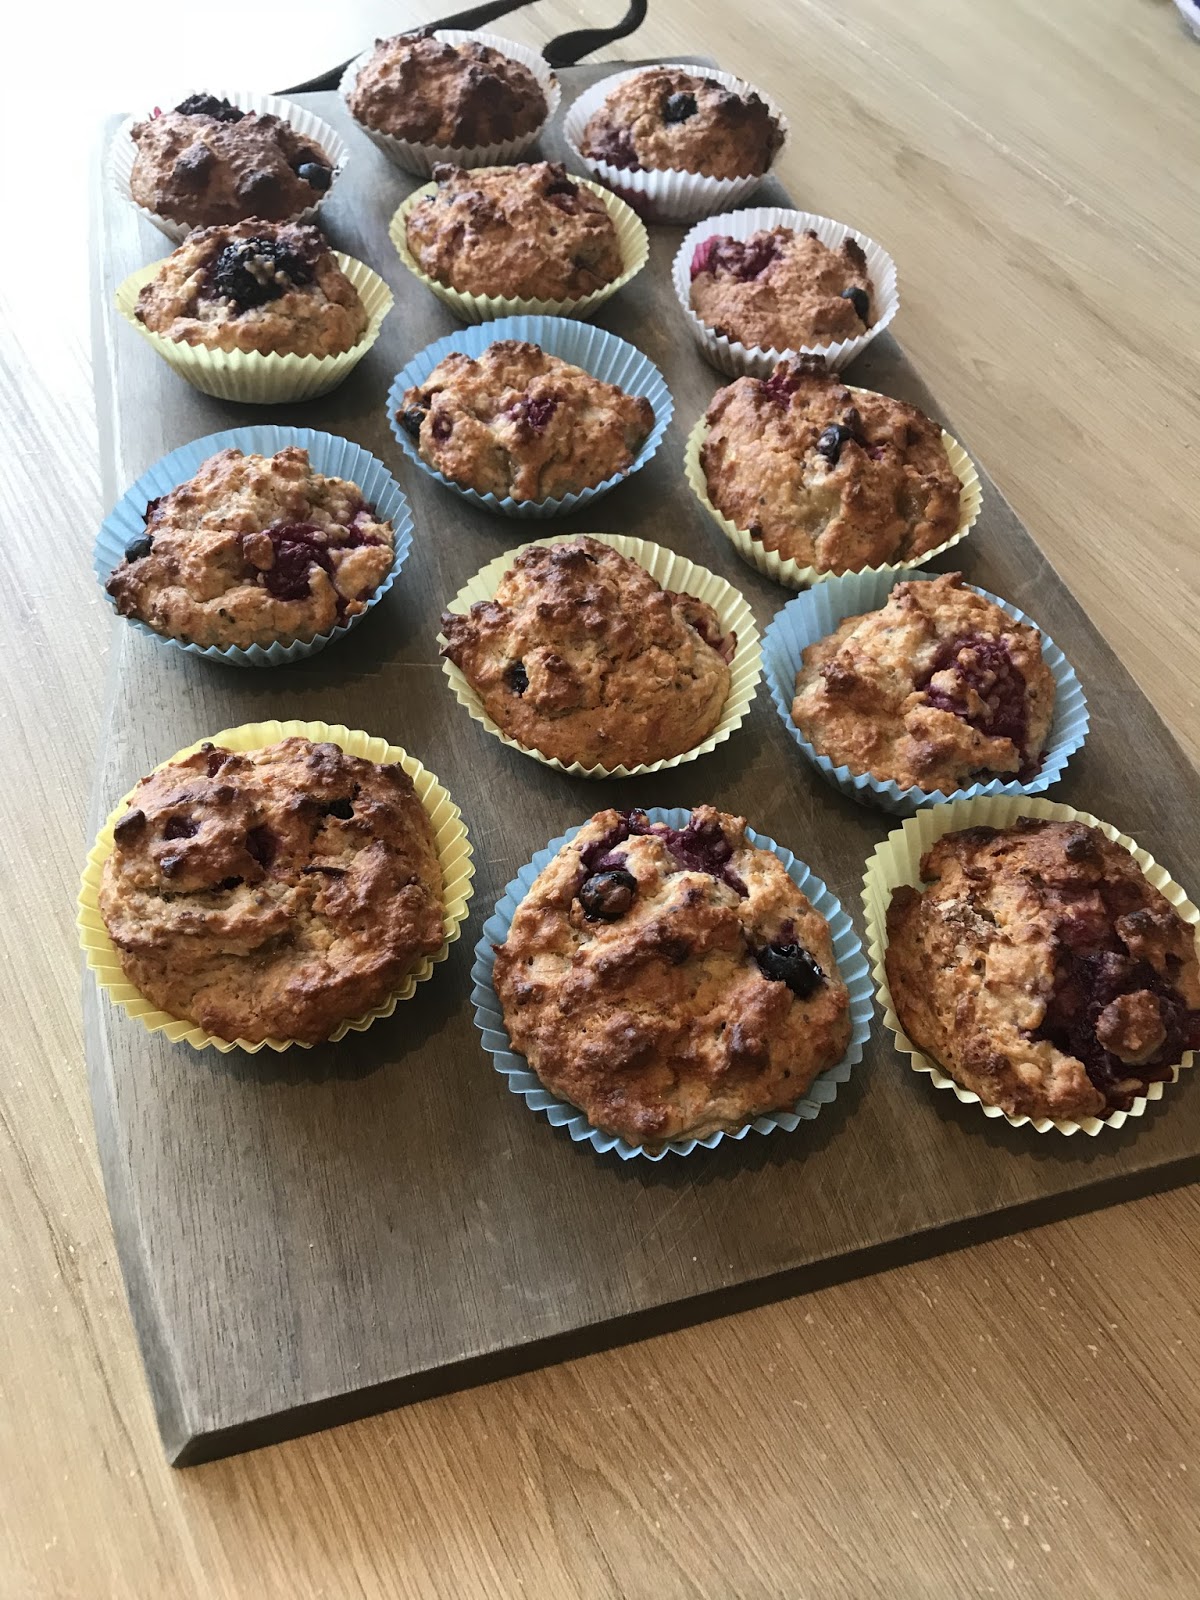
Banana and Berry Breakfast Muffins

I love making these with Bridget as they have all the fun of baking cakes, without some of the naughtier stuff and are a great breakfast alternative. 

They provide energy with their oaty goodness and the only sugars are from the honey, a drop of vanilla and the naturally occurring ones from the fruits. Adding in the chia seeds is like a little health boost for the children too - and they can't see them in the muffins so won't turn their nose up at them.

They are a great snack to pop into a lunchbox too and the below makes about 24 so these are perfect if you have a bunch of children round too and want a treat without oodles of sugar.

Banana and Berry Breakfast Muffins

Here's how:
  • 200g plain flour
  • 100g rolled oats
  • 50g dessicated coconut
  • 1 tsp bicarb
  • 2 tbsp chia seeds
  • 2 bananas
  • 75g frozen mixed berries
  • 4 tbsp natural yoghurt
  • 85ml olive oil
  • 2 eggs
  • 1 tsp vanilla extract
  • 2 tbsp honey

Firstly pre-heat the oven to 180 degrees and line a couple of muffin tins with cases.

Firstly weigh out all of the dry ingredients (four, oats, dessicated coconut, bicarb, chia seeds) into a large bowl, mix and set aside. 

Now in a smaller add the yoghurt, eggs, olive oil, vanilla and honey and combine well. It will be a bit of a miss-match at this stage, but make sure the egg yolks get broken up and this will be fine. 

Pour the wet ingredients into the dry and mix well until you have a thick cake batter.

Now peel the two bananas and mash well into a small bowl, then fold into the cake batter.

Add the frozen in berries in last and mix to evenly distribute.

Place 1 large tablespoon of cake batter into each muffin case.

Place into the oven and allow to bake for 25 minutes, or until they are well risen, and the topping is a beautiful golden brown. Enjoy!

Friday, 27 October 2017

Cooking with Kids: Spooky Halloween Chocolate Spider Biscuits

This is a really fun, quick and easy way of getting the kids involved in making some Halloween treats at home.

I use Oreo’s as they’re sturdier than single-layer biscuits, but you could adapt this to whatever round biscuits you have in the house. I also use liquorice sticks as the spider legs, but this could just as easily be cola laces. Equally for eyes, I’ve used mini marshmallows with a little dot of melted chocolate, and for the lips some red jelly lips, but these could both be icing pens otherwise. I serve on a bed of spooky sweets, white chocolate mice, jelly snakes etc.


The below makes 8 spiders.

Here’s how:
  • 1 pack original Oreo's
  • 200g milk chocolate
  • Pack of liquorice sticks
  • 16 mini marshmallows
  • Red jelly lips sweets 
Firstly cut the liquorice sticks down to quarter size, ensuring you have enough for 8 little legs, per spider - you’ll have 8 in total as a normal pack has 16 biscuits. Set aside.

Place a sheet of baking paper on the side to capture any mess of the assembly of the spiders.

Break up the chocolate into a china bowl and melt over a pan of recently boiled water. Use a wooden spoon to move the chocolate around and encourage it to melt.

Now you need to work fairly quickly at this point. Once fully melted, use a pastry brush to cover one side of 8 of the cookies with the melted chocolate. Bow rearrange the eight spider legs accordingly so they are dangling down, and one part is just pressed down into the soft, melted chocolate; this will act as your glue. Now, take one of the other Oreo's (the ones that were set aside and haven’t had chocolate on them) directly on top of the chocolate coating and legs and press down firmly.

Now brush on some more chocolate on top if the spiders ‘faces’ and assemble the faces. Position the two marshmallow eyes accordingly and press down so they stick into the chocolate, and then do the same with the sweetie lips.

Finally use a skewer or a coctail stick, dip the end into the remaining melted chocolate and touch the middle of the marshmallow eyes for pupils.

Leave to set for half hour then arrange onto spooky sweets, or however you are serving. Enjoy!

Some other ideas for keeping the kids occupied with a Halloween theme can be found below:


Making Mummified Sausage Rolls
Making these simple Chocolate Halloween Iced Biscuits
Make Halloween cards

Monday, 16 October 2017

Easy Chocolate Halloween Biscuits - Cooking with Kids

These biscuits are super simple to make, a fun activity for half term next week in the lead up to Halloween or for any spooky gathering. 

I grabbed a pack of cookie cutters from Poundstretchers which had shapes such as bats, Frankenstein's Monster faces, gravestones, pumpkins and cats, but you could apple the same method to any biscuit. If you only have round cooking cutters, just ice and then write 'RIP' on them or grab some of the Haribo sweeties like I have in the pictures with things such as spiders, bones, skeletons and the like and apply them. The main thing is that this is a really fun thing to do for Halloween with the children.

Bridget absolutely loves cooking and particularly baking anything sweet - this was the first time Beatrice (8 months) got involved in baking too, and enjoyed a little mix with the big spoon plus trying to scoop out the raw biscuit mixture! 

Easy Chocolate Halloween Biscuits

Here's how:

  • 125g butter
  • 110g caster sugar
  • 250g plain flour
  • 1 tsp vanilla extract
  • 2 tbsp cocoa powder
  • 1 egg
  • 1 tbsp milk
  • Flour to dust the worktop and rolling pin

To ice:

  • 3 tbsp icing sugar
  • Few drops of water
  • Food colouring (I just used red to make orange for the pumpkins)
  • Red icing pen
  • Selection of spooky sweeties (I used Haribo)


Pre-heat the oven to 180 degrees, then grease and line the baking trays with parchment paper and set aside.

In a large bowl, beat the egg, butter and sugar together with the vanilla extract until combined. Slowly sift in the flour and cocoa, stirring through as you go. Add the milk if the mixture is a little dry. Once satisfied with the dough, cover with cling film and place into the fridge for 20-30 minutes.

Remove biscuit dough from the fridge. Lightly dust your worktop space with flour, and rub flour up and down your rolling pin, then use your hands to pull off a small section at a time, and roll out into a thin dough, about 1cm thick. If it's too thin, it'll be very difficult to handle, unless your a very deft baker!

Now use your cookie cutter, to cut out the shapes that you wish to use, and place each shape onto the baking shape. They can be placed close together, but not touching. They shouldn't expand too much in the oven.

Repeat the process until all the dough has been used and the shapes placed onto the baking sheets. Now place into the hot oven and bake for 12-15 minutes. Remove from the oven and allow to completely cool on the baking sheets before moving.

To ice, you can do so however you wish, and decorate in any manner, we used jelly lips, teeth and fangs for the mouths of the bats and Frankensteins, raisins for eyes, I cut up a dried apricot for the ghost mouths, and once iced, we used spiders, bones and skeleton jellies to make the biscuits as spooky as possible. We wrote RIP on the gravestones in a red icing pen.

To make up relevant icing, you want it quite thick, so take 3 tbsp icing sugar, and just a drop or two of cold water, and stir through, you want it runny enough to pour or brush onto the biscuits, but thick enough to not set 'watery' or opaque. We just used simple plain icing sugar for most of the icing, then added a little drop of red food colouring to make an orange hued icing for the pumpkins. 

Experiment though, and most importantly let the kids enjoy this activity - it doesn't matter if the biscuits are the most beautifully decorated, it only matters that you all enjoyed making them together!

Beatrice's first baking experience
If you're having a Halloween get together or tea party, or just doing a fun and spooky dinner for the kids on 31st October, these easy peasy Mummified Sausage Rolls are a winner too.

Tuesday, 5 September 2017

Bridget's Easy Peasy Cheesy Veg Pasta Bake

A variation of this dish has been doing the rounds in our household since Bridget was eating solids - she has always loved anything carby (like her mother) be it pasta, rice or potatoes but she adores pasta in all it's many guises.

She has been 'helping' me in the kitchen since she was walking and now she's about to be three, she absolutely loves getting her apron on and helping out. This particular dish was made today, mainly by her, with the obvious help and cues from me, avoiding the hot oven and hob, but doing all the 'important' jobs.

You could use any pasta shape for this really, but with my weaning seven month old, Beatrice, in mind we used penne today, as it's a bit easier to grip than macaroni. This went down well with both girls today - three lots of vegetables in one hit too, winner. Of course you could play around with the vegetables used, depending on what's a favourite for your little ones, or what is easier to disguise, in some cases.


Bridget's Easy Peasy Cheesy Veg Pasta Bake


This is a great weaning dish once finger foods have been introduced - Beatrice loved it!


Baby Led Weaning with Pasta Bake


Here's how:


  • 1.5 tbsp unsalted butter
  • 1.5 tbsp plain flour
  • 250ml milk (I use full fat)
  • 60g Cheddar cheese 
  • 100g dry penne or other pasta
  • 1 tsp black pepper
  • 1 tsp mustard powder
  • Freshly grated nutmeg
  • 6 florets broccoli
  • 6 florets cauliflower
  • Cup of peas (fresh or frozen is fine)
  • Few breadcrumbs

Firstly pop the oven on at 200 degrees and fill and boil the kettle with water. 

Cook the broccoli and cauliflower first, using freshly boiled water - cook for four minutes, and then use a slotted spoon to remove from the pan and set aside. 

Add the penne to the pan and cook according to the pack instruction - be careful not to overcook, as it will cook a little more in the oven. Drain and place with the cauliflower and broccoli for the moment.

Now to make your cheese sauce, pop the butter into a frying pan, on a medium heat and allow to fully melt, gently. Next, add the flour and stir the whole time until the flour and butter is combined, it will be a bit of a mound or paste, now slowly add the milk a bit at a time, until all is combined, stirring all the time. It will be a fine liquid at this point but will thicken up in time. 


Cheesy Sauce

Now add the grated cheese, retaining a handful for the topping. Add the mustard powder, black pepper and grate over the fresh nutmeg - be liberal, the flavour is enhanced massively by this! Allow to cook out and thicken for five more minutes.

Now pour the cooked penne, broccoli and cauliflower into the cheese sauce and add the peas too. Stir and ensure everything is coated well in the sauce. Pour into an ovenproof dish and arrange with the broccoli and cauliflower florets facing upwards and evenly distributed.

Give another seasoning with black pepper and nutmeg, and scatter over the breadcrumbs and remaining cheese. 


Bridget's Easy Peasy Cheesy Veg Pasta Bake pre-bake

Bake for 20 minutes until the topping is golden brown. Enjoy!

Bridget's Easy Peasy Cheesy Veg Pasta Bake


Monday, 24 July 2017

Lemon and Honey Yoghurt Cake with Blueberries

 
Bridget with her masterpiece - the Lemon and Honey Yoghurt Cake with Blueberries
Yoghurt cakes are a favourite in this household, they keep moist for longer than other cakes and can keep for a week or so in the fridge; if they don't get eaten sooner.

This one is flavoured with honey and lemon and I make it in a silicone bundt mould with blueberries popped onto the base, which makes a beautiful, squished blue and purple topping once baked; irresistible. With a quick lemon icing to finish the cake, it's always a crowd pleaser. You can play around with other fruits too but blueberries go really well with the lemon.

My eldest daughter, Bridget is almost three and absolutely loves cooking with me, and particularly baking. I think it's a great, sensory activity for children of all ages, and love the thought that I am instilling into her an interest and indeed, a passion for food and cooking. Today's bake is our first 'big' one together, outside of biscuits, cupcakes and fairy cakes, and I was so pleased it turned out so well to see her little happy face.  

Lemon and Honey Yoghurt Cake with Blueberries


Here's how:

  • 325g caster sugar
  • 60g butter
  • 3 large eggs
  • 230g Greek Natural Yoghurt
  • Rind of one lemon
  • 2 tbsp honey
  • 175g self raising flour
  • 100g blueberries
  • drizzle of vegetable or rapeseed oil

For the icing:
  • 150g icing sugar
  • Juice of 1 lemon

Firstly pre-heat the oven to 180 degrees and lightly grease your bundt mould or tin with the vegetable or rapeseed oil. (Obviously you can use a different shaped baking tin if you don't have a bundt). If using a silicone mould, like myself, place onto a baking tray or tin.

Pop the blueberries into the base of the bundt (or other) mould, no particular pattern, just try to evenly spread them around.


Separate the eggs, with the yolks being popped into a large mixing bowl and the whites into a smaller one.

Now add to the egg yolks the butter and sugar and beat until smooth. Add the rind of the lemon and the yoghurt and mix well. Now stir through the honey.


Now beat the egg whites until soft peaks are formed and there are lots of bubbles, to ensure a good rise. Now slowly fold the egg whites into the cake batter.

Finally pour the batter into the cake mould, even out as much as possible and then place the mould into the centre of the oven.


Bake for 45 minutes or until golden brown, and when pricked with a skewer, it comes out dry.

Leave to cool for 20 minutes before turning out onto a cake stand or plate, and once turned over, gently peel the mould away.

Lemon and Honey Yoghurt Cake with Blueberries pre-icing


To make the icing, simply sift the icing sugar into a small bowl, and juice the lemon and mix well. You should be left with a thick, glossy, white icing. Use a spoon to drizzle over the top - be warned if making this with a little person, like Bridget, expect this to become a bit of a sticky mess, but it only adds to the fun. For a final flourish, add the leftover lemon zest over the top of the icing.

Lemon and Honey Yoghurt Cake with Blueberries


Leave the icing to set for thirty minutes or so, and then serve, preferably with a mug of tea. Enjoy!

Some other cake ideas that might be fun to make with your little ones:
Guilt Free Apple Cake
Pig Face Cupcakes
Double Chocolate Traybake
Chocolate Cornflake and Marshmallow Cakes
Lemon Drizzle Cake
St Clement's Drizzle Cake
Lemon Curd and Blueberry Muffins
Chocolate Olive Oil Cake

Wednesday, 9 November 2016

Cooking with Children: Chocolate, Cornflake and Marshmallow Cakes

I'm a very firm believer in encouraging children to cook from a young age, and Bridget has been making cakes and 'helping' me in the kitchen since before she was able to walk and would just 'stir' cake ingredients from the comfort of her high chair. She absolutely loves to help Mummy, and her favourite job of all is to 'make cakes' - a really fun activity for children of most ages, especially with the added bonus of eating them afterwards and handing them out proudly to various family members. Bridget has her own little apron and loves going to fetch it if I invite her to do some cooking in the kitchen.

These Chocolate Cornflake Marshmallow Cakes are a slight step up from the ones I made myself as a child and are absolutely delicious, rich with milk chocolate, crisp from the cornflakes but gooey from the marshmallow - just gorgeous and very tempting for children and adults of all age. They are easy to make, take very little time and are a great way of spending quality time with your little one in the kitchen.

For these particular cakes, I bought all of the ingredients from Lidl too for less than £3.00 so it's an inexpensive family activity.

The below makes 12 cakes.
Chocolate, Cornflake and Marshmallow Cakes

Here's how:
  • 80g butter (unsalted)
  • 1 pack mini marshmallows
  • 1 large bar milk chocolate
  • 80g raisins
  • 250g cornflakes

Firstly get your little one to wash their hands with you and get them into this habit before doing any tasks in the kitchen and then help them tie their apron.

Now little one can be in charge of breaking up the chocolate into a crack and melt-proof bowl (without eating any if possible!) while Mum or Dad (or whoever is cooking with little one) boils the kettle and places a small saucepan on the hob with some just boiled water.

Excitedly breaking up and sneaking in a few bites of chocolate
Once all the chocolate is broken up and placed into the ceramic dish, add the butter and two thirds of the pack of marshmallows and place the bowl over the boiling water. Obviously if allowing little ones to help at this stage, be extremely careful and be on hand at all times - Bridget knows that this step is 'burnies'. 

Chocolate, butter and marshmallows melting

Chocolate, butter and marshmallows melting
Now get little one to pour the Cornflakes into a mixing bowl, then you pour over the melted chocolate and marshmallow mix and allow little one to stir. Add the raisins now too and stir well.

Mummy's little helper
Get your toddler or child to line a cupcake tin with 12 cake cases and then help her to spoon a generous spoonful into each - it doesn't matter if this is a little messy, this is all part of the fun.

Adding the finishing touches

Once the mixture is evenly distributed allow your little one to scatter or place a few marshmallows over the top and set aside to set for an hour or so. Enjoy!